The period between “deal closed” and “first value delivered” is where most client relationships are won or lost. A slow, confusing, or inconsistent onboarding experience creates doubt in the client's mind before the work even starts. A fast, organized, automated onboarding experience does the opposite — it reinforces that they made the right choice.
Why onboarding should be automated
Manual onboarding is error-prone. Things get forgotten. Welcome emails go out late. Project tools don't get set up. Kickoff calls get scheduled on the wrong day. Every dropped ball is a signal to the client that you might drop balls on the actual work.
Automated onboarding solves this with consistency. Every client goes through the same high-quality experience, regardless of how busy you are or how many clients you're onboarding simultaneously.
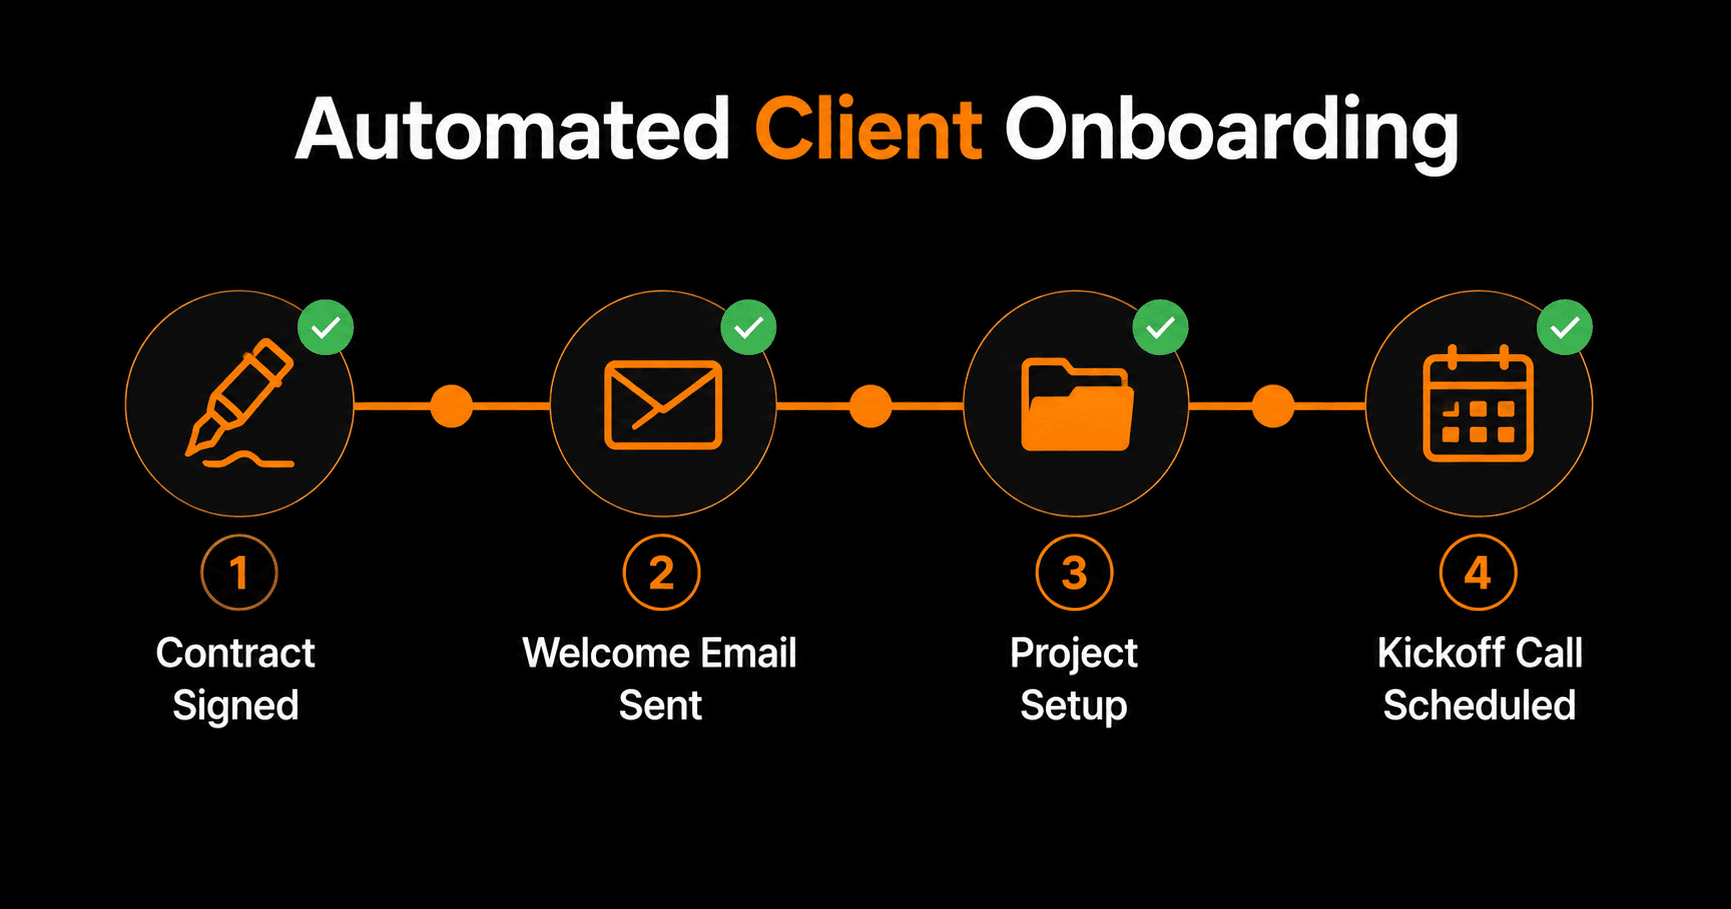
The 5-step automated onboarding workflow
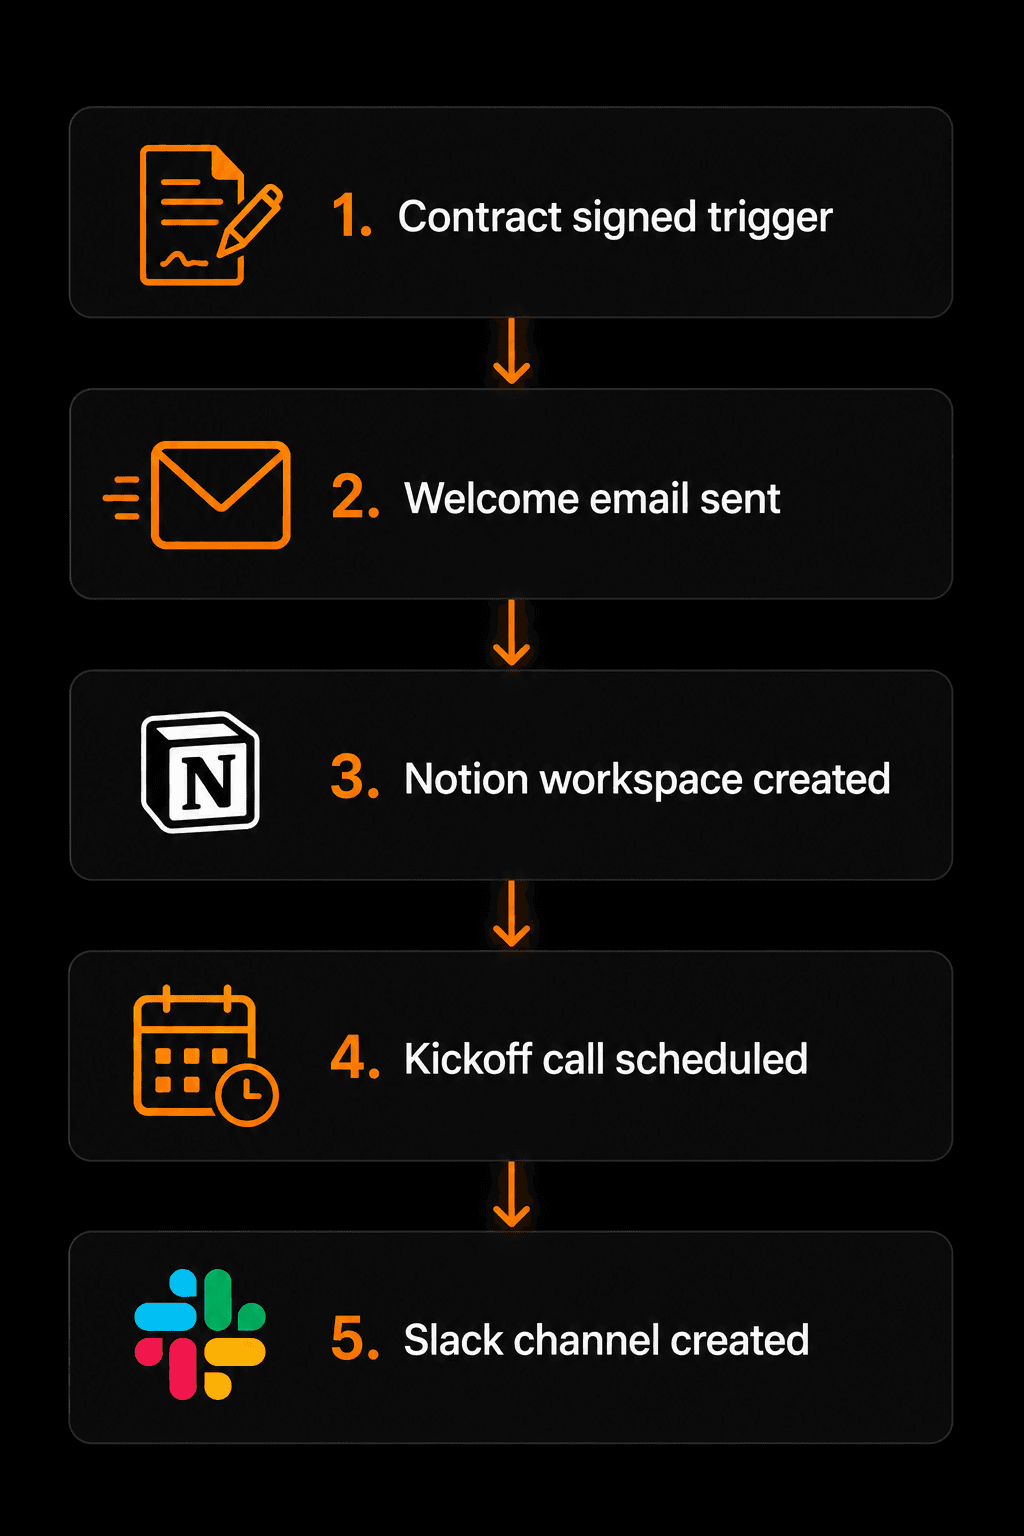
The complete automated onboarding workflow — five steps, zero manual work
Step 1: Trigger — contract signed
The moment a contract is signed (via your CRM, DocuSign webhook, or a form submission), the onboarding workflow fires. This is the trigger event that starts everything. Nothing runs until this happens, so there's no risk of premature onboarding.
Step 2: Welcome email sent instantly
Within 60 seconds of the contract signing, the client receives a personalized welcome email. It confirms their start date, introduces the project team, outlines what happens next, and includes any documents they need to review. The AI personalizes it with their name, company, and the specific service they purchased.
Step 3: Project workspace created
Automatically create the client's project space in Notion, Asana, ClickUp, or Trello — whichever you use. Populate it with your standard project template: kickoff agenda, discovery questionnaire, milestone tracker, shared document folder. The workspace is ready before the client has even read their welcome email.
Step 4: Kickoff call scheduled
Send a calendar invite or Calendly link for the kickoff call with your proposed times pre-populated based on your calendar availability. When the client confirms a time, the calendar event is created automatically and a reminder is sent 24 hours and 1 hour before.
Step 5: Slack channel created
Create a dedicated Slack channel named after the client (e.g., #client-acme), invite the relevant team members, and post the project workspace link and kickoff call details. The client gets a channel invite with instructions for joining. All project communication now has a home.
What to include in the welcome email
The welcome email sets the tone for the entire relationship. Include:
- A warm, specific opening (reference what they bought and why it was a good decision)
- What happens in the next 48 hours (the automated steps they'll experience)
- A link to the project workspace they've been given access to
- The kickoff call link or a note that scheduling details are coming separately
- One clear next action for the client (fill out the discovery questionnaire, accept the calendar invite)
- Your direct contact for urgent questions
How to build this in Vendarwon Flow
- Connect your tools. Authorize your CRM (HubSpot or Pipedrive), Notion or Asana, Gmail, Slack, and Google Calendar in the Integrations tab.
- Set the trigger. Use a webhook from your CRM when a deal moves to “Closed Won,” or a form submission trigger if you use a manual contract process.
- Describe the workflow. “When a new client contract is signed, immediately send them a personalized welcome email from my Gmail, create a Notion workspace from my project template, send a calendar invite for a kickoff call, and create a Slack channel named #client-[company name] with me and [team member] as members.”
- Test with a dummy client. Submit a test contract signing and trace every step through the Executions log. Confirm the email arrived, the Notion page was created, and the Slack channel exists.
- Activate. Every client from this point onward gets the same excellent onboarding experience.
Post-onboarding automations to add later
Once the initial onboarding workflow is solid, add these to complete the client lifecycle:
- 30-day check-in: 30 days after project start, automatically send a satisfaction check email
- Milestone alerts: when a milestone is marked complete in your project tool, notify the client automatically
- Invoice reminders: 7 days before invoice due date, send a polite reminder with the payment link
- Offboarding: when a project closes, send a testimonial request, case study consent form, and referral ask automatically
Frequently asked questions
What if my onboarding process is different for each client?
Add a conditional branching step. Based on the service type, deal size, or client category (enterprise vs. SMB), the workflow routes to different onboarding tracks. Each track can have its own welcome email template, project workspace structure, and kickoff process.
How do I handle onboarding for international clients in different time zones?
Build a timezone detection step — extract the client's timezone from the form or CRM, and use it to schedule the kickoff call and any time-specific notifications in their local time. Google Calendar handles timezone conversion automatically once the timezone is set.
Can I add a human review step before certain automations run?
Yes — use the approval node. For high-value clients or complex onboardings, pause the workflow after the welcome email and wait for your review before proceeding with workspace creation and scheduling. You receive a Slack notification with an approve/reject link and can continue or modify the workflow from there.